1. Overview
In this tutorial, we’ll explore the Testcontainers Desktop application, a simple yet powerful tool for running Testcontainers. We’ll learn how to use it to configure our Docker environment, manage the container lifecycle, and get insights about our development and testing patterns.
2. Testcontainers Desktop
Testcontainers Desktop offers a minimal UI designed to simplify the Testcontainer configuration and debugging. We can download Testcontainers Desktop for free from the official website. To start using it, we’ll sign up by creating an account or via a third party like Google, GitHub, or Docker.
That’s all! Once we install the application and sign in, we can start using Testcontainers Desktop in our development workflow:
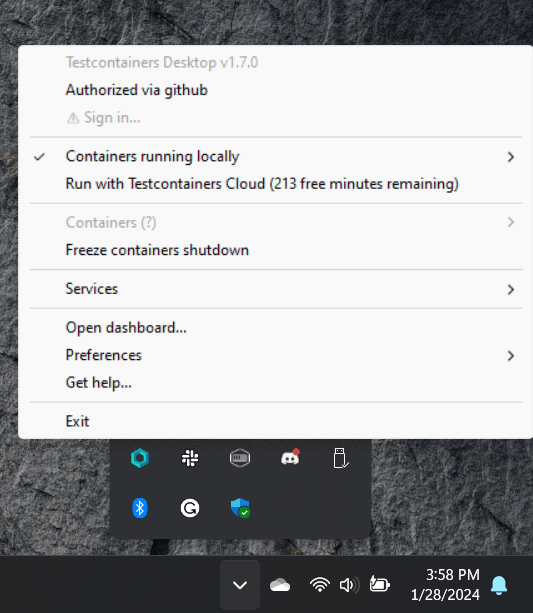
We should see the Testcontainers logo in the taskbar. If we right-click on it, we’ll see some of the key features we’ll be exploring today:
- Use Testcontainers Cloud
- Freeze containers shutdown
- Define fixed ports
- Interact with the containers
- See Testcontainers dashboard
- Perform advanced customizations
3. Testcontainers Execution Modes
Testcontainers Desktop offers developers two main ways to run tests: locally or in the cloud. Notably, local execution is the default behavior.
3.1. Local Execution
Local execution leverages our local Docker environment. For instance, let’s run a JUnit test that uses Testcontainers to spin up a MongoDB Docker container:
@Testcontainers
@SpringBootTest
class DynamicPropertiesLiveTest {

    @Container
    static MongoDBContainer mongoDBContainer = new MongoDBContainer(DockerImageName.parse("mongo:4.0.10"));

    @DynamicPropertySource
    static void setProperties(DynamicPropertyRegistry registry) {
        registry.add("spring.data.mongodb.uri", mongoDBContainer::getReplicaSetUrl);
    }

    @Test
    void whenRequestingHobbits_thenReturnFrodoAndSam() {
        // ...
    }
}
If we don’t already have the Docker image locally, we’ll see Docker pulling it in the logs. After that, the MongoDB container starts:
org.testcontainers.dockerclient.DockerClientProviderStrategy - Found Docker environment with local Npipe socket (npipe:////./pipe/docker_engine)
org.testcontainers.DockerClientFactory - Docker host IP address is localhost
org.testcontainers.DockerClientFactory - Connected to docker:
    Server Version: 4.8.3
    API Version: 1.41
    Operating System: fedora
    Total Memory: 7871 MB
org.testcontainers.DockerClientFactory - Checking the system...
org.testcontainers.DockerClientFactory - ✔︎ Docker server version should be at least 1.6.0
tc.mongo:4.0.10 - Pulling docker image: mongo:4.0.10. Please be patient; this may take some time but only needs to be done once.
tc.mongo:4.0.10 - Starting to pull image
tc.mongo:4.0.10 - Pulling image layers:  1 pending,  1 downloaded,  0 extracted, (0 bytes/? MB)
tc.mongo:4.0.10 - Pulling image layers:  0 pending,  2 downloaded,  0 extracted, (0 bytes/0 bytes)
[ ... ]
tc.mongo:4.0.10 - Pull complete. 14 layers, pulled in 17s (downloaded 129 MB at 7 MB/s)
tc.mongo:4.0.10 - Creating container for image: mongo:4.0.10
tc.mongo:4.0.10 - Container mongo:4.0.10 is starting: 3d74c3a...
tc.mongo:4.0.10 - Container mongo:4.0.10 started in PT21.0624015S
Furthermore, we can manually check if the container is created by running the “docker ps” command in the terminal.
3.2. Testcontainers Cloud Execution
Testcontainers Cloud provides a scalable platform for running tests in cloud environments. This is ideal if we don’t want to run the containers locally or if we don’t have access to a running Docker environment.
TestContainer Cloud is a paid feature of Testcontainers, but we can use it for free for up to 300 minutes per month.
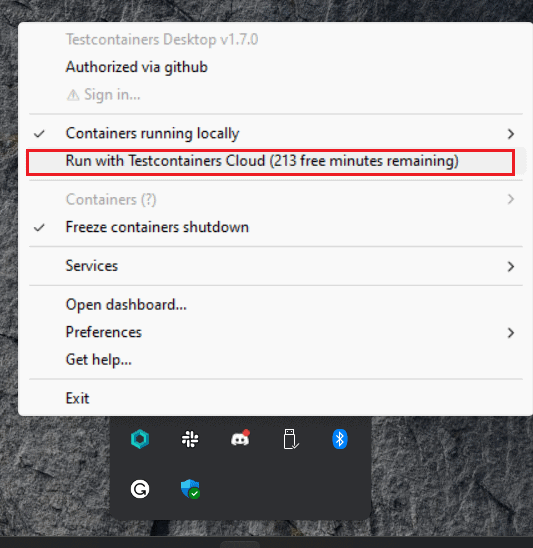
From the small UI, let’s switch to “Run with Testcontainers Cloud”:
Let’s re-run the test using this option, and read through the logs again:
org.testcontainers.dockerclient.DockerClientProviderStrategy - Found Docker environment with Testcontainers Host with tc.host=tcp://127.0.0.1:65497
org.testcontainers.DockerClientFactory - Docker host IP address is 127.0.0.1
org.testcontainers.DockerClientFactory - Connected to docker:
    Server Version: 78+testcontainerscloud (via Testcontainers Desktop 1.7.0)
    API Version: 1.43
    Operating System: Ubuntu 20.04 LTS
    Total Memory: 7407 MB
org.testcontainers.DockerClientFactory - Checking the system...
org.testcontainers.DockerClientFactory - ✔︎ Docker server version should be at least 1.6.0
tc.mongo:4.0.10 - Pulling docker image: mongo:4.0.10. Please be patient; this may take some time but only needs to be done once.
tc.mongo:4.0.10 - Starting to pull image
tc.mongo:4.0.10 - Pulling image layers:  0 pending,  0 downloaded,  0 extracted, (0 bytes/0 bytes)
tc.mongo:4.0.10 - Pulling image layers: 12 pending,  1 downloaded,  0 extracted, (0 bytes/? MB)
[ ... ]
As expected, a different environment was used and the Docker images are no longer downloaded locally. Needless to say, if we run the command “docker ps“, we won’t see any container running locally.
4. Debugging Testcontainers
Testcontainers Desktop facilitates a smooth debugging experience, through features such as preventing container shutdowns, defining fixed ports, customizing configurations to suit our needs, and directly engaging with containers.
4.1. Freeze Container Shutdown
We can use the Desktop application to manually control the container’s lifecycle. For instance, we can use the option “Freeze container shutdown” to allow a running container to keep running even after the test that started it has terminated:
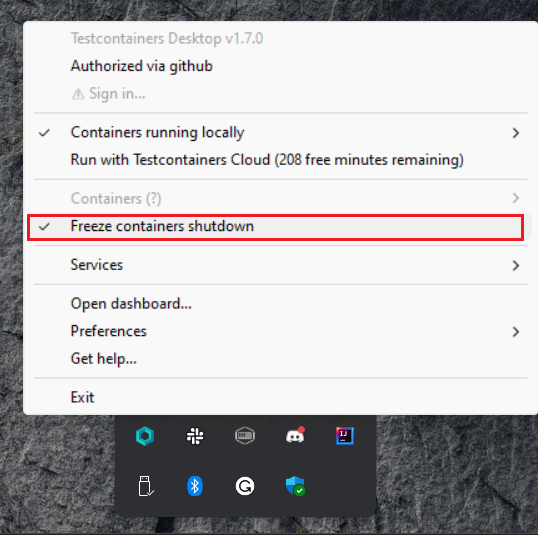
If we enable this feature and re-run the tests, we’ll receive a notification confirming that the container has been frozen.
Next, we’ll identify the port on our local machine that corresponds to the exposed port of the Docker container. MongoDB conventionally operates on port 27017. Let’s open a terminal and run the command “docker ps” to see this mapping:

As we can see, Docker is mapping the container’s port 27017 to port 64215 from our machine. Consequently, we can use this port to connect to the database through our preferred MongoDB client application.
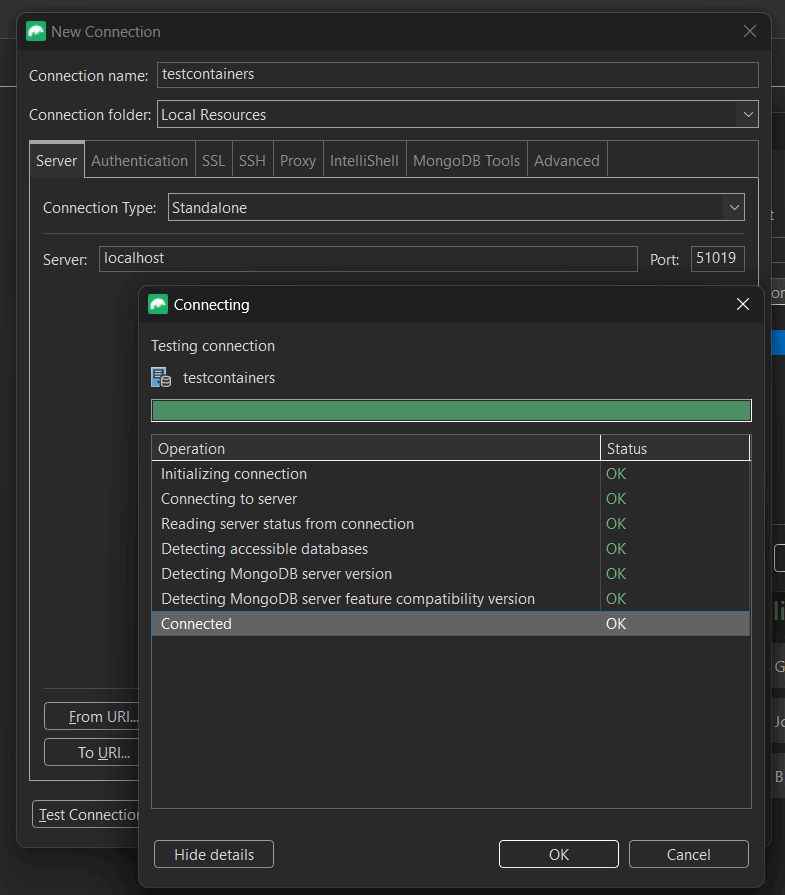
Studio3T is a graphical user interface for MongoDB, facilitating database management, querying, and visualization. Let’s use it to configure and test the connection to our Mongo Testcontainer:
Our test inserted some records into the “characters” collection from the “test” database. Let’s run a simple query to list all the records from the collection:
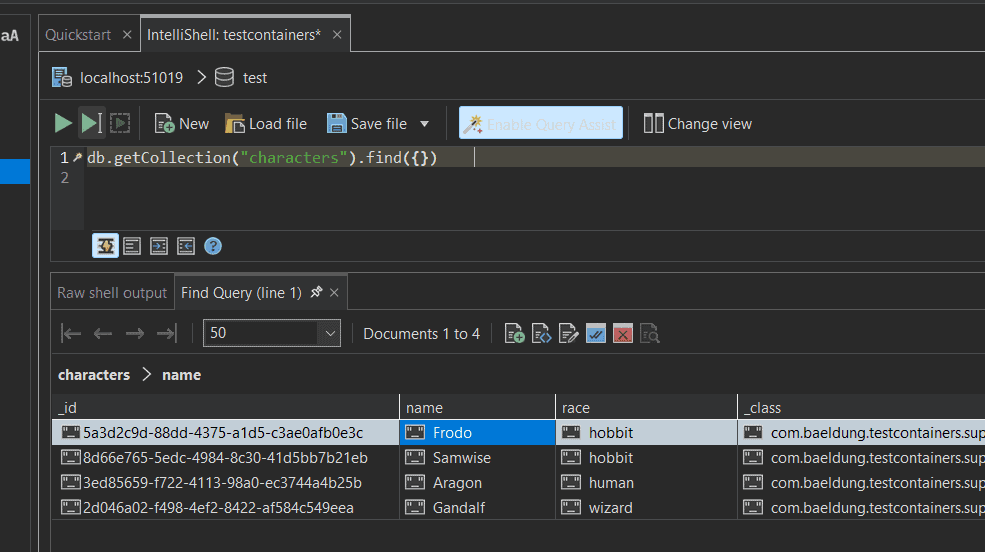
As we can see, all records are present in the database.
4.2. Define Fixed Ports
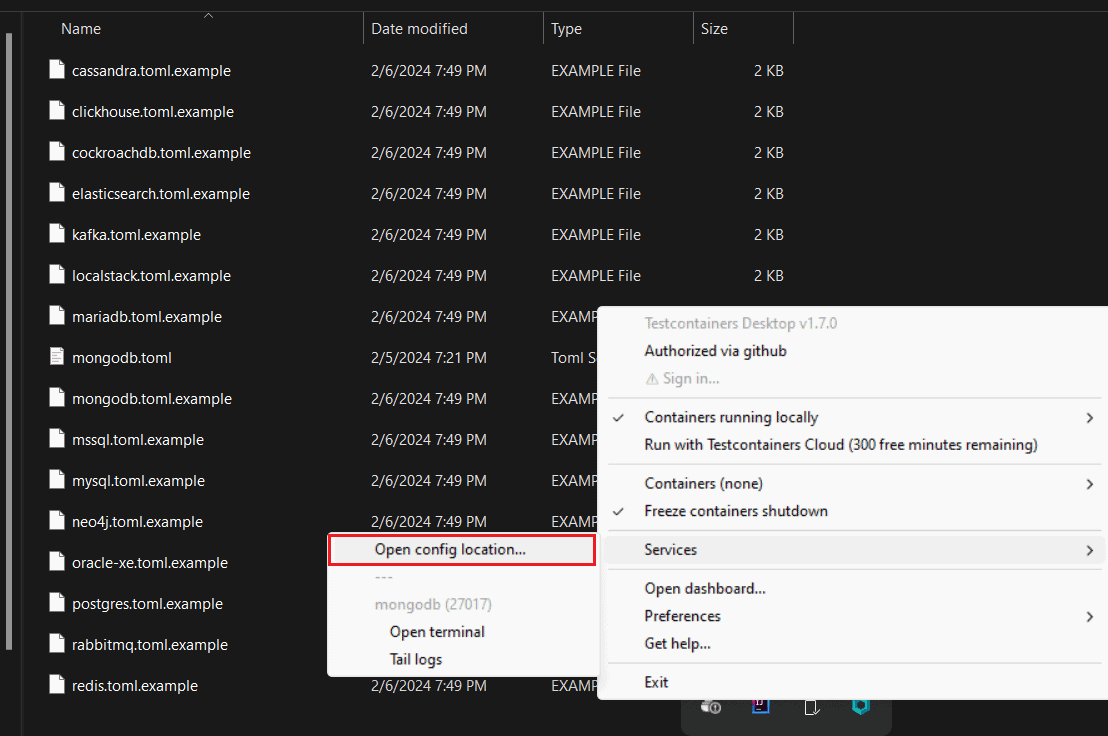
Normally, Testcontainers starts on random ports. However, if we often need to find the exposed port for debugging purposes, we can define fixed ports instead. To achieve this, we first need to navigate to Services > Open config location. This opens a folder containing configuration examples for a few of the more popular Testconatiners modules:
Let’s stick to our use case and inspect the “mongodb.toml.example” file. First, we’ll rename it to “mongodb.toml“, removing the “.example” extension.
Now, let’s examine the file’s content. The comments explain step by step, how to customize this file to allow Testcontainers Desktop to properly proxy the service’s ports. Let’s focus on the “ports” variable, we can use it to define the mapping between the local port and the container port:
# `local-port` configures on which port on your machine the service is exposed.
# `container-port` indicates which port inside the container to proxy.
ports = [
  {local-port = 27017, container-port = 27017},
]
As a result, just by renaming the file and enabling this configuration, we’ll be able to connect to the MongoDB database using the fixed port 27017.
In other words, we no longer need to manually check the port mapping each time we re-run the test, and we can rely on Mongo’s default port instead.
4.3. Interact With the Containers
Sometimes, even connecting to the database isn’t sufficient, for example when we require more detailed debugging. In this case, we can directly access the Docker container itself. For example, we can open a terminal that is attached to the container and interact with it.
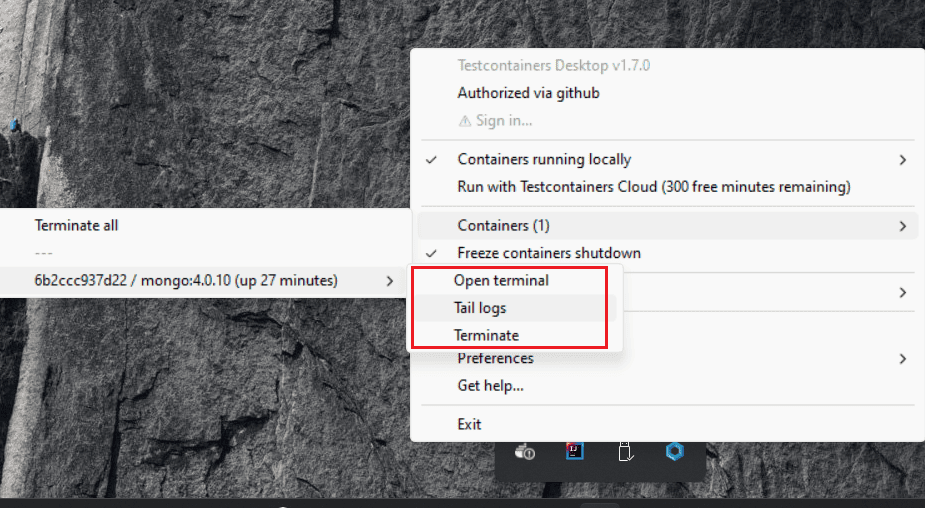
To do this, we navigate to Containers and then we select the container we want to debug. After that, we’ll be prompted with three actions to choose from: “Open terminal“, “Tail logs“, or “Terminate“:
The “Open terminal” action allows us to access a terminal attached to the container. For instance, we can use this terminal to start the MongoDB shell and query data without needing to install any MongoDB client application on our local system.
Let’s start by opening a terminal (Containers > mongo:4.0.10 > Open terminal):
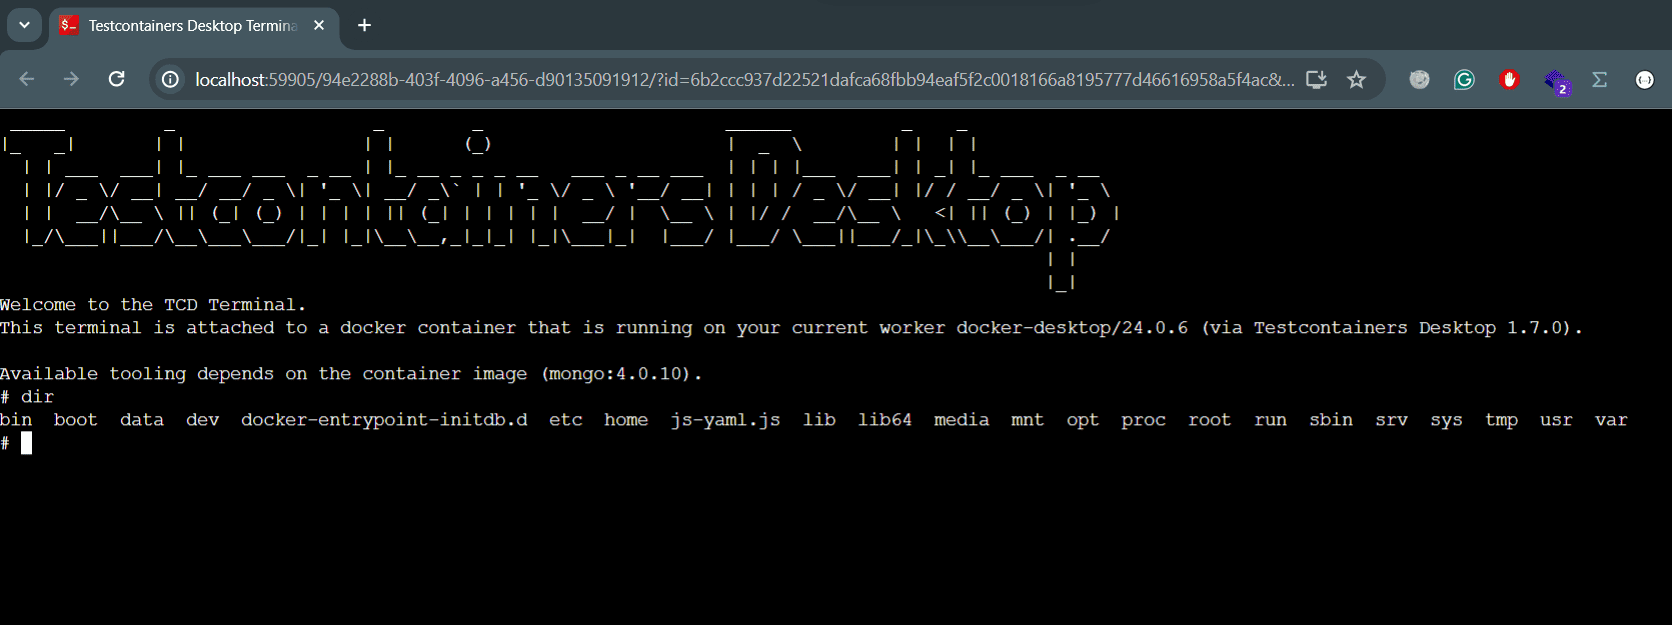
From this point forward, the instructions depend on the container we use and the use case we want to debug. In our case, let’s execute the following commands:
- “mongo” – opens the MongoDB shell prompt
- “show dbs” – lists the databases present on the server
- “use test” – switches to the “test” database, the one created by our application
- “db.getCollection(“characters”).find({“race”:”hobbit”})” – queries the “characters” collection and filters by the “race” attribute
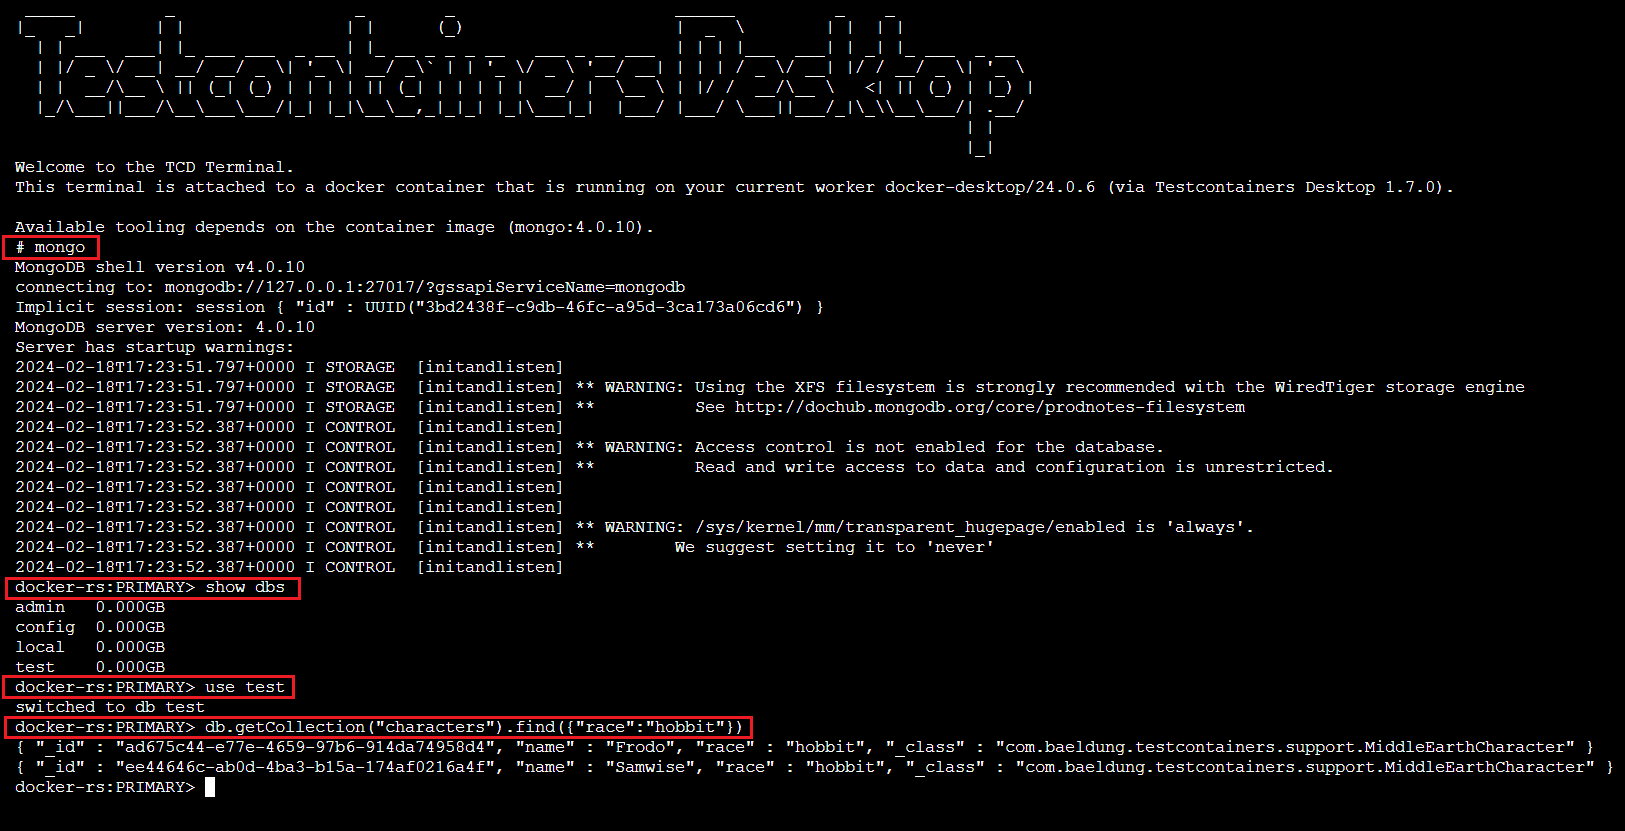
As expected, we can see the commands being executed using the MongoDB shell. The last query, db.getCollection(…), retrieves a list of records from the “characters” collection of the “test” database.
5. Testcontainers Dashboard
Testcontainers Desktop provides a user-friendly dashboard with a summary of the Testcontainers we used. We can access this webpage by selecting the “Open Dashboard…” option from the menu:
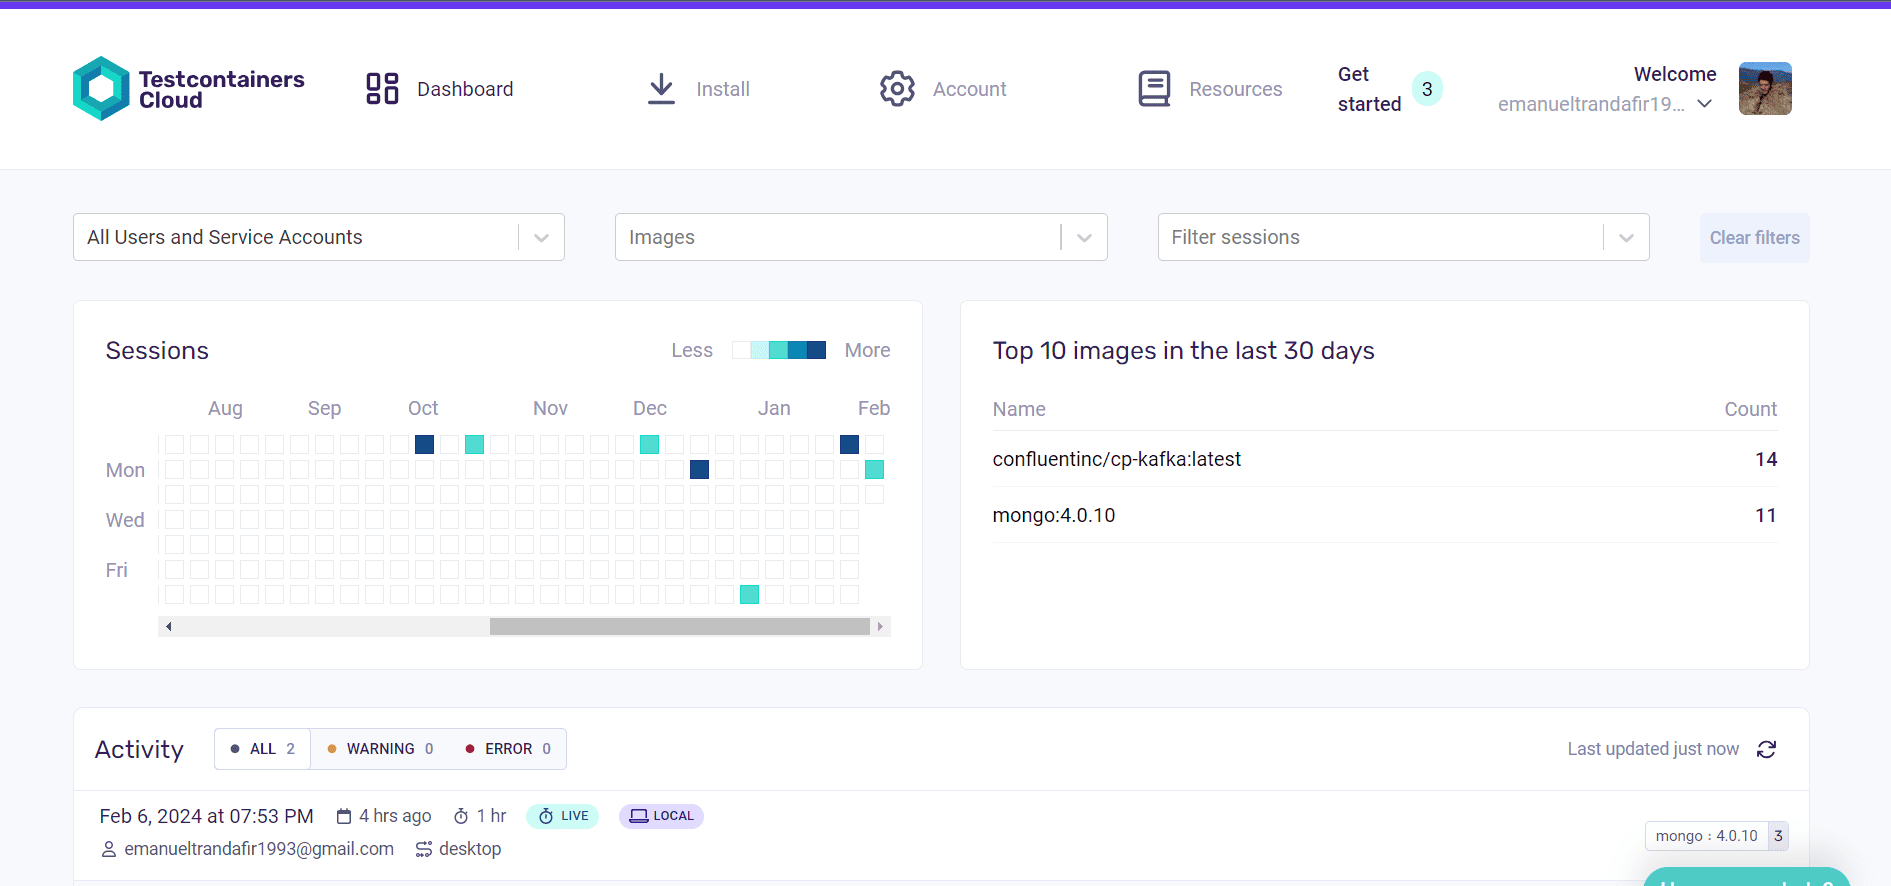
The dashboard offers an overview of the Testcontainers and images used, as well as useful links to resources and account settings. At the bottom of the page, we can see the recent activity and the environment used for execution.
This collaborative tool aggregates test data across desktop and CI environments, offering insights into development and testing patterns. Widgets on the dashboard help answer questions about testing consistency, release impact, popular container images, and outdated dependencies.
6. Conclusion
In this article, we discovered the diverse features of the Testcontainers Desktop application, which help us run and debug Testcontainers. We explored freezing container shutdowns, employing fixed ports, and accessing a terminal attached to the container. Additionally, we looked at the Testcontainers Dashboard, a tool that enhances visibility and insights into testing activities.
As always, the code examples used in this article are available over on GitHub.


