1. Overview
Starting in Java 18 we’ve access to the Simple Web Server, which was introduced in JEP 408. We can access its functionality through a command line tool and an API.
The Simple Web Server offers a bare-bones web server that serves static files. It’s described as being useful for testing, prototyping, and education. The server is intentionally very simple to set up and run and doesn’t aim to compete with or replace more fully functional options such as Apache Tomcat or Jetty.
One of the goals of introducing the tool is to get developers up and running with web development with the fewest possible barriers.
In this tutorial, we’ll learn about Simple Web Server and how it works.
The first and easiest way to start up a server is to use the provided command-line tool.
2.1. Startup
The command we need here is jwebserver. Using the command jwebserver by itself is enough to start the server up.
We see this response if everything is working:
$ jwebserver
Binding to loopback by default. For all interfaces use "-b 0.0.0.0" or "-b ::".
Serving /usr and subdirectories on 127.0.0.1 port 8000
URL http://127.0.0.1:8000/
By default, the directory we’re in when we run the command is the one served, so /usr, in the example above. However, we can change the directory with the -d flag:
$ jwebserver -d /opt
Binding to loopback by default. For all interfaces use "-b 0.0.0.0" or "-b ::".
Serving /opt and subdirectories on 127.0.0.1 port 8000
URL http://127.0.0.1:8000/
Notably, we have to provide an absolute path here.
We can also change the port and address with the -p and -b flags:
$ jwebserver -b 0.0.0.0 -p 3003
Serving / and subdirectories on 0.0.0.0 (all interfaces) port 3003
URL http://192.168.1.1:3003/
Running the above configuration exposes our current directory to anyone on our network at the IP address given in the output. While this may be useful if we’re trying to transfer files we should be sure we’re happy to share them first.
2.2. GET Requests
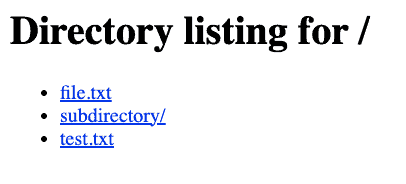
We can access the web server using a browser to navigate to the correct address and port. Once we’re there we’ll see a list of files and subdirectories from within the directory from where we started the server:
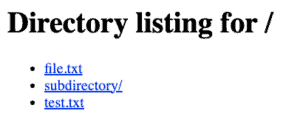
If we then access any of these files we’ll see them in our browser and also a new line in our terminal:
127.0.0.1 - - [09/Feb/2024:12:06:26 +0000] "GET /file.txt HTTP/1.1" 200 -
Similarly, when entering a new subdirectory we’ll see the GET request logged with the directory we’re accessing:
127.0.0.1 - - [09/Feb/2024:12:06:52 +0000] "GET /subdirectory/ HTTP/1.1" 200 -
3. API
The second option for working with the Simple Web Server is the API. By using it, we can gain a lot more control and customize how requests are handled.
3.1. Defining a Server
To start let’s recreate our command-line web server using the API.
To do this we’ll use the class SimpleFileServer. We can use this class for three things – creating a HttpServer, creating a HttpHandler, and creating a HttpFilter.
First, we’ll just create and start a server using createFileServer():
public static void main(String[] args) {
    InetSocketAddress address = new InetSocketAddress(8080);
    Path path = Path.of("/");
    HttpServer server = SimpleFileServer.createFileServer(address, path, SimpleFileServer.OutputLevel.VERBOSE);
    server.start();
}
Here we’ve specified an address, using the InetSocketAddress class. We also could have changed the rest of the address here and not just the port.
We’ve then set up a Path object leading to the directory we want to serve.
Next, we’ve passed these in as arguments, along with the logging level, to createFileServer(). As before, we can configure any of these to meet our needs. The resulting web server is identical to the one created using the command line tool and can be accessed via our browser at 127.0.0.1:8080.
3.2. Handlers
Clearly, creating the server above didn’t offer any benefits over the command line tool. To start gaining some control, we’ll need to introduce a HttpHandler.
Let’s look at adding a custom one to our server. We can create a handler using another method from SimpleFileServer, createFileHandler(). Assuming we then already have a server like the one created earlier, we can attach our new handler to it:
HttpHandler handler = SimpleFileServer.createFileHandler(Path.of("/Users"));
server.createContext("/test", handler);
This results in all traffic to 127.0.0.1:8080/test going through our new handler.
We can use handlers to do much more than this. For example, let’s set up a server that simulates being allowed and denied access on different endpoints. We can use the method HttpHandlers.of() to create responses for both allowing and denying access:
HttpHandler allowedResponse = HttpHandlers.of(200, Headers.of("Allow", "GET"), "Welcome");
HttpHandler deniedResponse = HttpHandlers.of(401, Headers.of("Deny", "GET"), "Denied");
Next, we need a Predicate defined to decide when to return each response:
Predicate<Request> findAllowedPath = r -> r.getRequestURI()
  .getPath().equals("/test/allowed");
This returns true only when we try and access the URL /test/allowed. All other endpoints fail.
We can now use HttpHandlers.handleOrElse(), which takes our Predicate and both options. It performs the first if the Predicate passes, otherwise the second:
HttpHandler handler = HttpHandlers.handleOrElse(findAllowedPath, allowedResponse, deniedResponse);
Finally, we can set up our HttpServer as before using the new HttpHandler:
HttpServer server = SimpleFileServer.createFileServer(address, path, SimpleFileServer.OutputLevel.VERBOSE);
server.createContext("/test", handler);
The result is that navigating to http://127.0.0.1:8080/test/allowed shows the text ‘Welcome‘ with a 200 response. Navigating to any other path displays ‘Denied‘ with a 401 response. We can use this as needed to set up test environments. The potential complexity is quite low, however.
3.3. Filters
The final aspect of the SimpleFileServer class is the ability to create a Filter. The role of this Filter will be to handle log messages. By defining our own we can redirect our messages to an OutputStream of our choosing.
The creation of the server is different when applying a Filter. First, let’s create the Filter using createOutputFilter():
Filter filter = SimpleFileServer.createOutputFilter(System.out, SimpleFileServer.OutputLevel.INFO);
We’ve used System.out as a simple example of an OutputStream here, but we could have used a logger or anything else we wanted.
Next, we’ll use the create() method from the HttpServer class with the filter we just made:
HttpServer server = HttpServer.create(new InetSocketAddress(8080), 10, "/test", handler, filter);
There are a few arguments there, so let’s go through them. First, the address is in the form of an InetSocketAddress as before. Second, an integer specifies the socket backlog. This is the maximum number of TCP connections allowed to queue at once. Third, we have the context. Here we’ve specified we want to deal with traffic hitting 127.0.0.1:8080/test. The fourth argument is a HttpHandler, similar to the one we created earlier. Finally comes our Filter as the fifth argument.
This provides the same functionality as when we used a handler before. However, we now have complete control over the log output.
4. Conclusion
In this article, we’ve seen that we can quickly spin up Java 18’s Simple Web Server and that it provides a small amount of helpful functionality.
First, we saw that by using the command-line tool jwebserver we can have a server up and running in moments. This server provides read access to the files and subdirectories in the location we run it.
Following that, we looked at the API and the new classes available such as SimpleFileServer. Using this API we could achieve the same results as the command-line tool, but programmatically. We could also extend our control using HttpHandler and Filter.
As always, the full code for the examples is available over on GitHub.