1. Introduction
In this tutorial, we’ll see how we can create a new API inside a JHipster application. We’ll then integrate that API into the front-end display.
2. Sample Application
For this tutorial, we’ll be using a simple book store application.
The book store is built as a monolith. It uses Angular for the front-end and has a single entity named book with the following fields:
- Title
- Author
- Published Data
- Price
- Quantity
JHipster automatically generates APIs and front-end views that provide simple operations for a book: view, create, edit, and delete.
For this tutorial, we’ll add an API that lets a user purchase a book, along with a button on the front-end that calls the new API.
We’ll focus just on the API and front-end aspects of purchasing. We won’t perform any payment processing and only minimal validation.
3. Spring Boot Changes
JHipster provides a generator for creating new controllers. However, for this tutorial, we’ll manually create the API and associated code.
3.1. Resource Class
The first step is to update the generated BookResource class. We add the new endpoint that the front-end code will call:
@GetMapping("/books/purchase/{id}")
public ResponseEntity<BookDTO> purchase(@PathVariable Long id) {
    Optional<BookDTO> bookDTO = bookService.purchase(id);
    return ResponseUtil.wrapOrNotFound(bookDTO);
}
This creates a new API endpoint located at /books/purchase/{id}. The only input is the book’s id, and we return a BookDTO that will reflect the new stock level after purchasing.
3.2. Service Interface and Class
Now, we need to update the BookService interface to include a new purchase method:
Optional<BookDTO> purchase(Long id);
Then, we need to implement the new method in the BookServiceImpl class:
@Override
public Optional<BookDTO> purchase(Long id) {
    Optional<BookDTO> bookDTO = findOne(id);
    if (bookDTO.isPresent()) {
        int quantity = bookDTO.get().getQuantity();
        if (quantity > 0) {
            bookDTO.get().setQuantity(quantity - 1);
            Book book = bookMapper.toEntity(bookDTO.get());
            book = bookRepository.save(book);
            return bookDTO;
        }
        else {
            throw new BadRequestAlertException("Book is not in stock", "book", "notinstock");
        }
    }
    return Optional.empty();
}
Let’s look at what is happening in this code. First, we look up the book by its id to confirm it exists. If it doesn’t, we return an empty Optional.
If it does exist, then we ensure it has a stock level greater than zero. Otherwise, we throw a BadRequestAlertException. While this exception is normally only used in the REST layer of JHipster, we’re using it here to demonstrate how to return useful error messages to the front-end.
Otherwise, if the stock is greater than zero, then we reduce it by one, save it to the repository, and return the updated DTO.
3.3. Security Configuration
The final change required is in the SecurityConfiguration class:
.antMatchers("/api/books/purchase/**").authenticated()
This ensures calls to our new API are only allowed by authenticated users.
4. Front-End Changes
Now let’s focus on the front-end changes. JHipster creates a view for displaying a single book, and that’s where we’ll add our new purchase button.
4.1. Service Class
First, we need to add a new method to the existing book.service.ts file. This file already contains the methods for manipulating book objects, so it’s a good place to add the logic for our new API:
purchase(id: number): Observable<EntityResponseType> {
    return this.http
        .get<IBook>(`${this.resourceUrl}/purchase/${id}`, { observe: 'response' })
        .pipe(map((res: EntityResponseType) => this.convertDateFromServer(res)));
}
4.2. Component
Then, we need to update the component code in book.component.ts. We’ll create a function that calls the new method in the Angular book service and then listens for the response back from the server:
purchase(id: number) {
    this.bookService.purchase(id).subscribe(
        (res: HttpResponse<IBook>) => {
            this.book = res.body;
        },
        (res: HttpErrorResponse) => console.log(res.message)
    );
}
4.3. View
Finally, we can add a button to the book view that calls the new purchase method in the component:
<button type="button"
             class="btn btn-primary"
             (click)="purchase(book.id)">
    <span>Purchase</span>
</button>
The image below shows the updated view on the front-end:
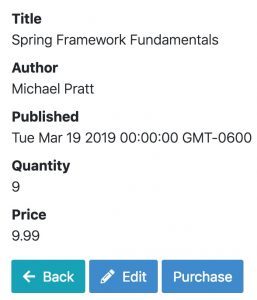
Clicking the new Purchase button will result in a call to our new API, and the front-end will automatically update with the new stock status (or display an error if something went wrong).
5. Conclusion
In this tutorial, we have seen how to create custom APIs in JHipster, and integrate them into the front-end.
We started by adding the API and business logic into Spring Boot. Then, we modified the front-end code to utilize the new API and display the results. With just a little effort we were able to add new functionality on top of the existing CRUD operations that JHipster automatically generates.
And as always, the code is available over on GitHub.


