1. Overview
IntelliJ is a trendy integrated development environment (IDE) tool for code development. It is an intelligent code assistance that enhances code productivity and fastens development work. Additionally, it follows a structured way to organize the project directory. Also, it is used in various programming languages like Python, Java, Kotlin, Lua, and many more.
In this tutorial, we’ll learn how to enable the line number in IntelliJ in different ways. Furthermore, allowing the line to number in the project is a handy feature in writing and debugging code.
2. Enable Line Number Globally
Enabling the line number is a straightforward task as it enhances code productivity and the experience for developers. Furthermore, it helps in writing code quickly and effectively. In IntelliJ, we can enable this feature globally and file-specific.
To demonstrate, let’s first look at enabling this feature globally for all projects:
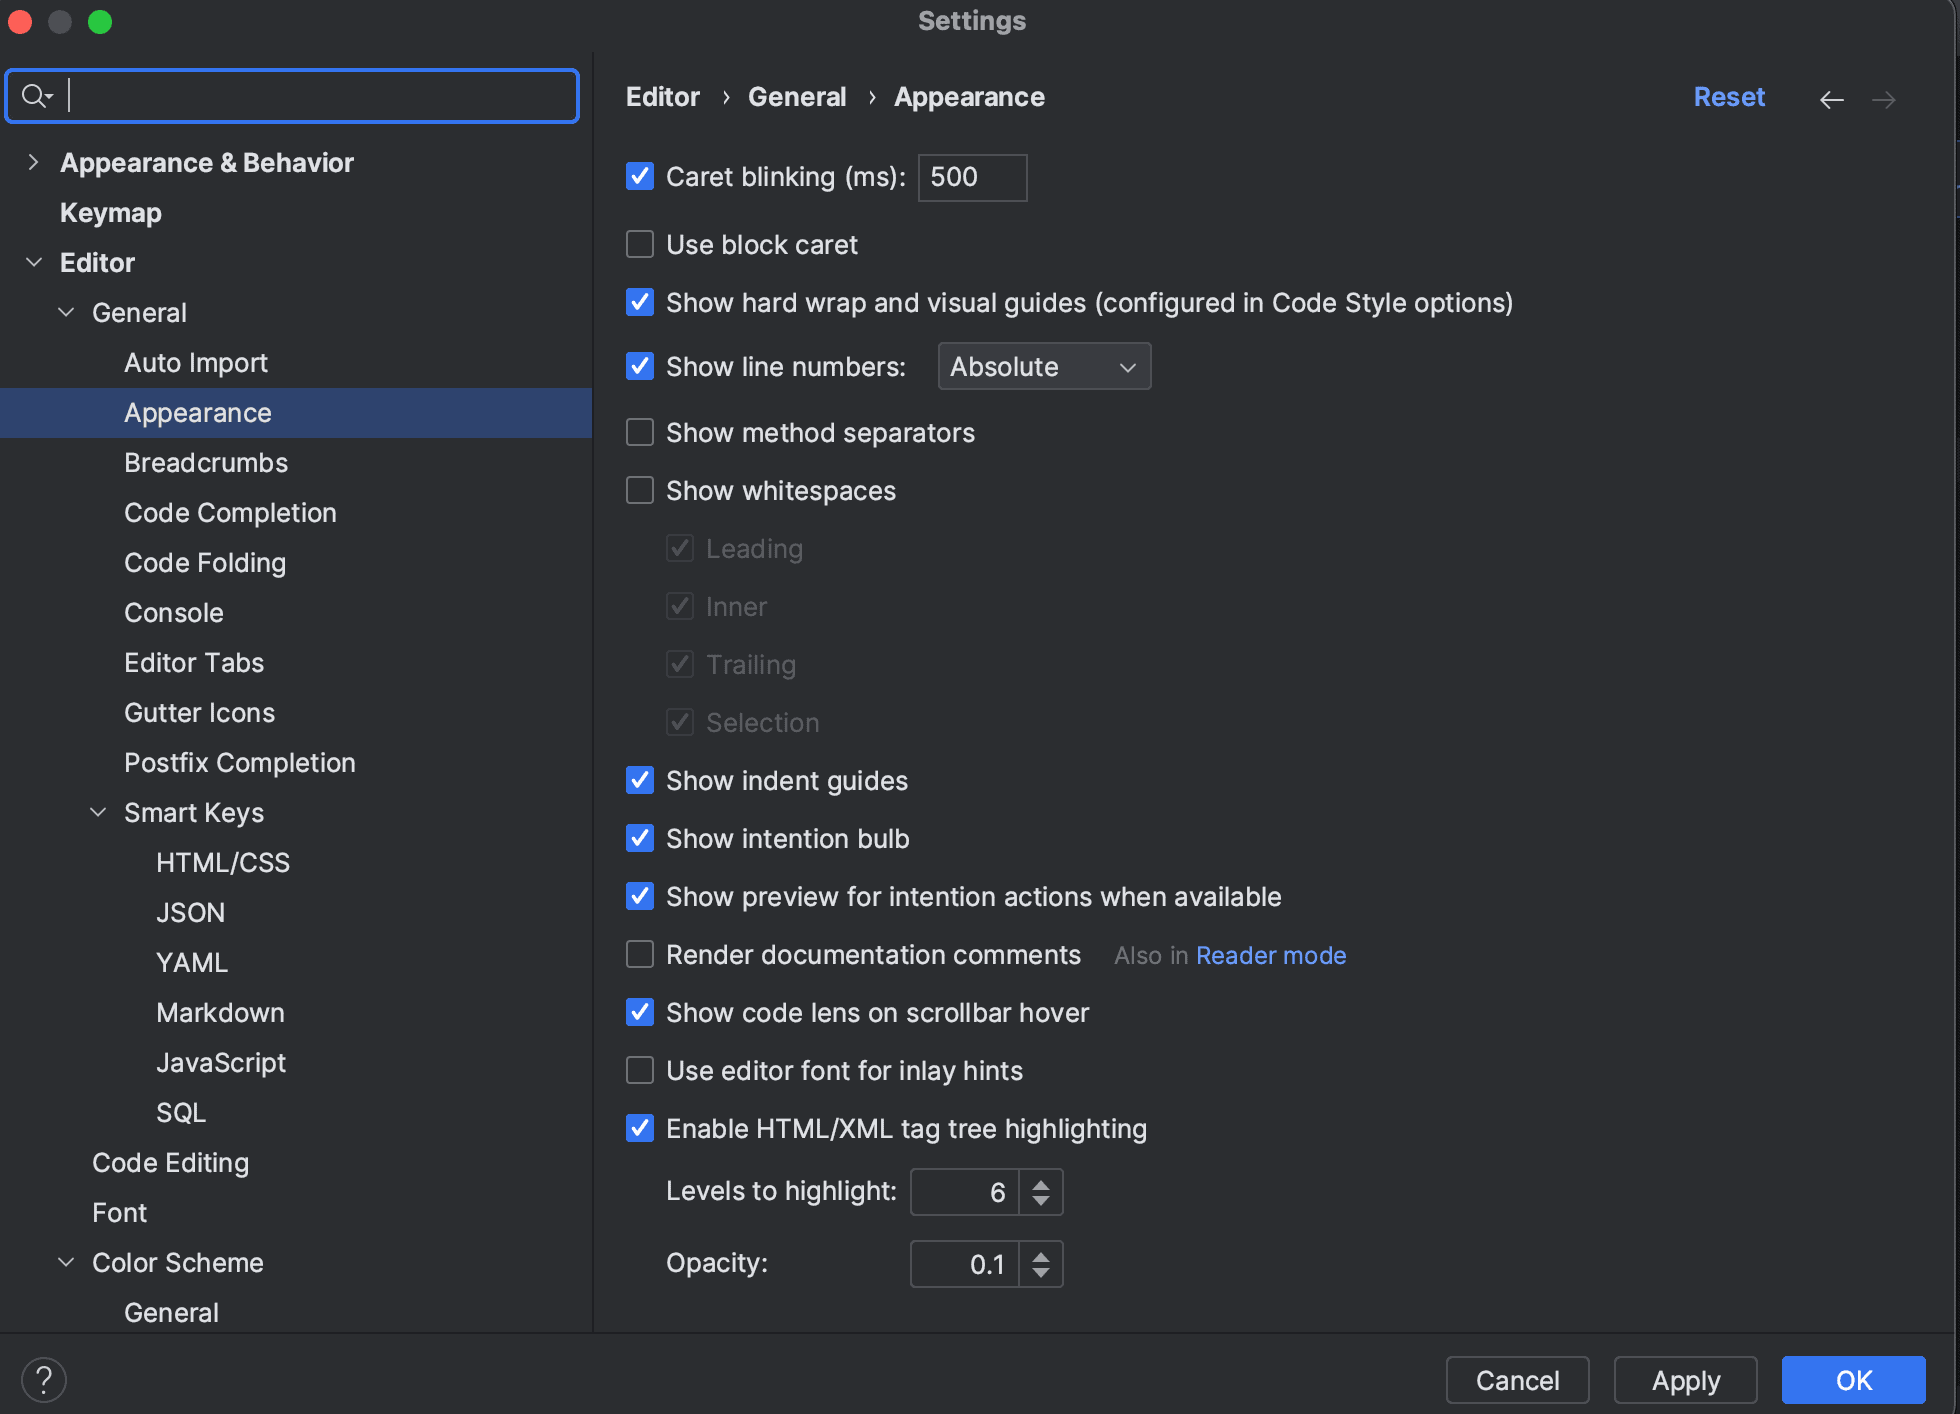
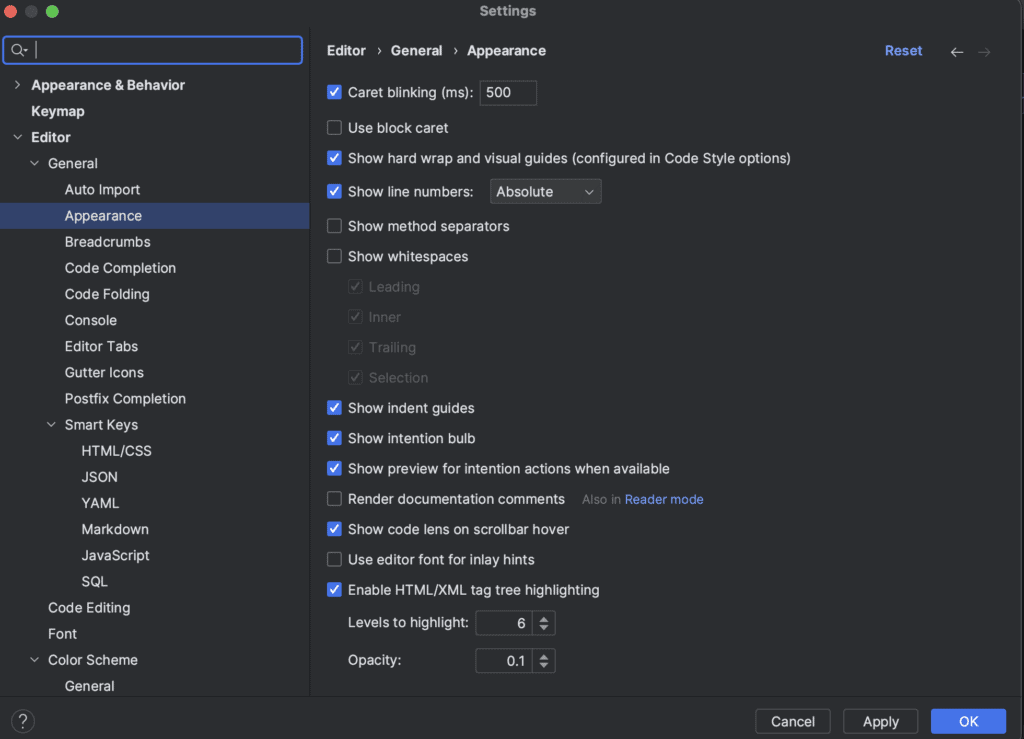
- Open the IntelliJ IDEA IDE
- Click on the IntelliJ IDEA in the top menu
- Click on Settings
- Click on Editor > General > Appearance
- Check the box next to Show line numbers
The above-explained entire process is visible in the GUI below:
This way, we can easily enable the line number for all the projects added to IDEA. Furthermore, restarting the IDE can also ensure that the changes have been remembered.
3. Enable Line Number per File
In IntelliJ IDEA, we can also enable a line number per file basis. Using this method, we can further control which files display line numbers in the code. To illustrate, let’s look at the steps to enable line numbers for a specific file:
- Open the IntelliJ IDEA IDE
- Pick a file from a project
- Right-click on the left marker of the opened file
- Select Appearance from the list
- Check the box next to show line numbers
To illustrate, let’s look at the GUI of the above process:
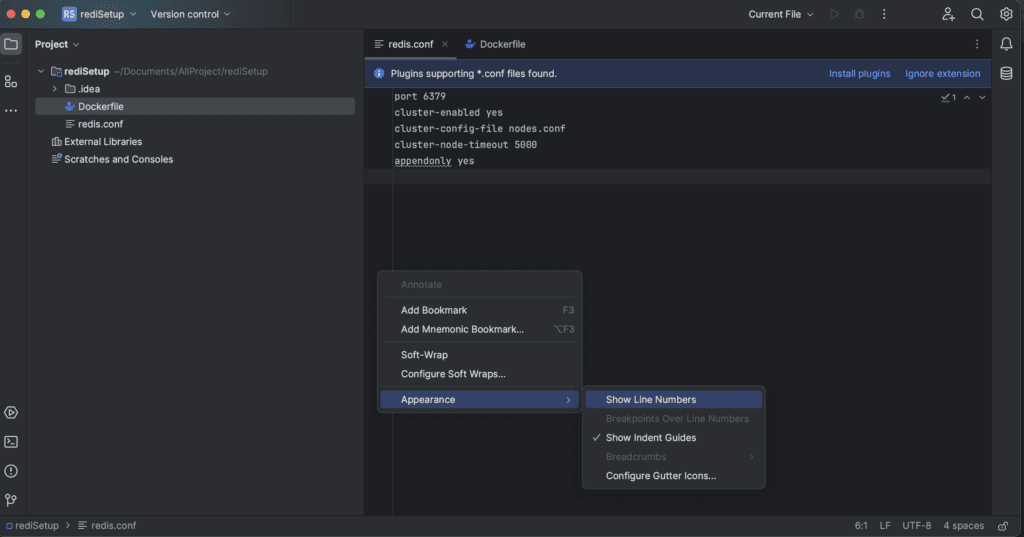
Enabling a line number per file basis allows developers to customize the code settings. As a result, we can further optimize resource usage and improve code readability, navigation, and collaboration by customizing the specific needs of the code file.
4. Using the Shortcut Key
By enabling a line, we can jump directly to the specific line of code within the code, which makes navigation easier. Additionally, it assists in identifying code errors, reviewing code documentation, and finding duplicate code. Furthermore, we can enable this line in IntelliJ by using shortcuts. To illustrate, let’s look at the process step-by-step:
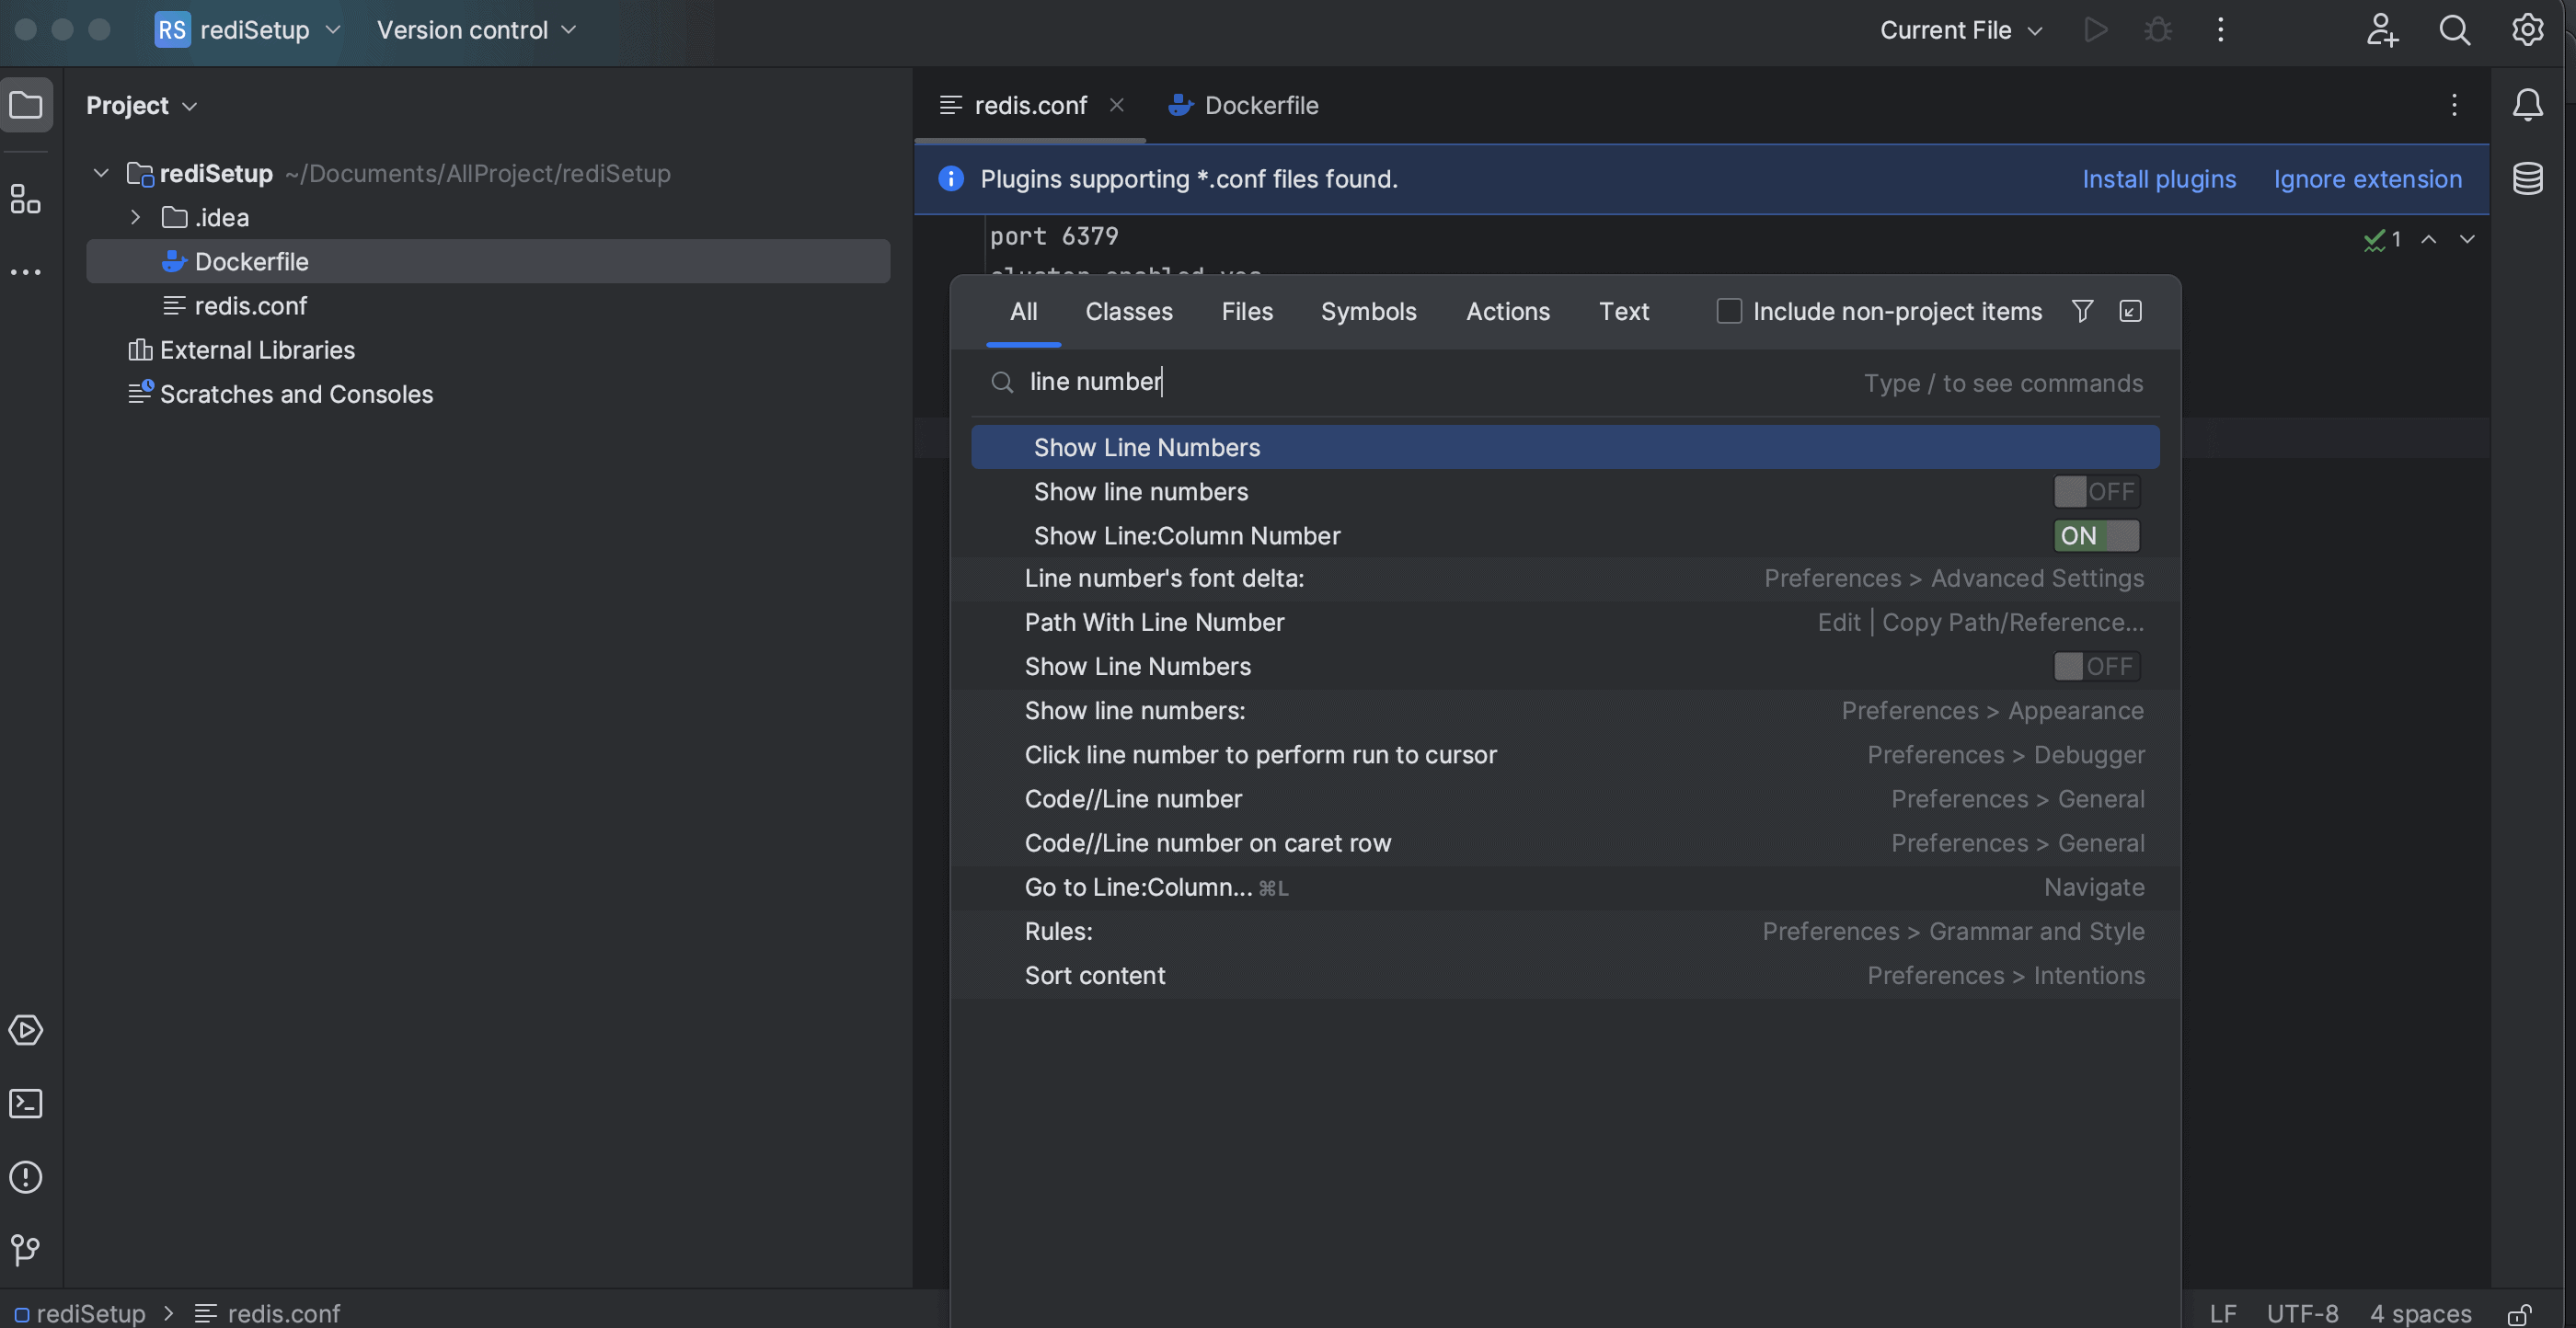
- Open the IntelliJ IDEA IDE
- Press the Shift key twice
- Type/Search line number
- Enter to enable/disable the feature
In the below, we can see the final GUI to enable/disable the line number:
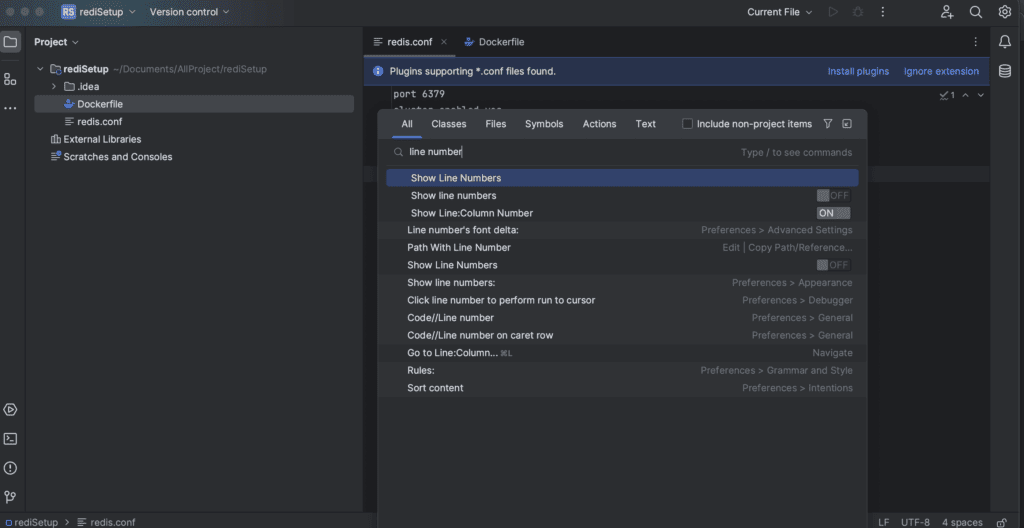
The above approach is beneficial and handy to enable/disable this feature. Furthermore, with a keyboard shortcut, we can easily toggle the absence of a line number in our code.
5. Conclusion
In this article, we explored various ways to enable line numbers in IntelliJ IDEA. First, we looked at enabling line numbers for all the projects inside the IDE. After that, we also looked at performing the same for a specific file.
Finally, we enabled the line number using a keyboard shortcut.