1. Overview
Eclipse is a very popular integrated development environment (IDE) used for various programming languages. It’s cross-platform, available for free, and primarily used for Java applications.
It’s necessary to have UTF character encoding when working with Java-based applications, specifically when our application needs to handle various kinds of languages.
In this tutorial, we’ll explore how to support UTF-8 encoding in Eclipse. Furthermore, we’ll learn the use and importance of UTF-8 encoding in an application.
2. Benefits of UTF-8 Encoding
UFT-8 is a versatile 8-bit character encoding that supports all characters and symbols from various languages and scripts.
Additionally, it’s widely supported by various programming languages, platforms, and engineering standards.
Also, it has seamless compatibility with ASCII character encoding. This gives it an extra edge over other encodings.
Furthermore, it permits developers to build very reliable and globally acceptable applications with the support of data exchange formats.
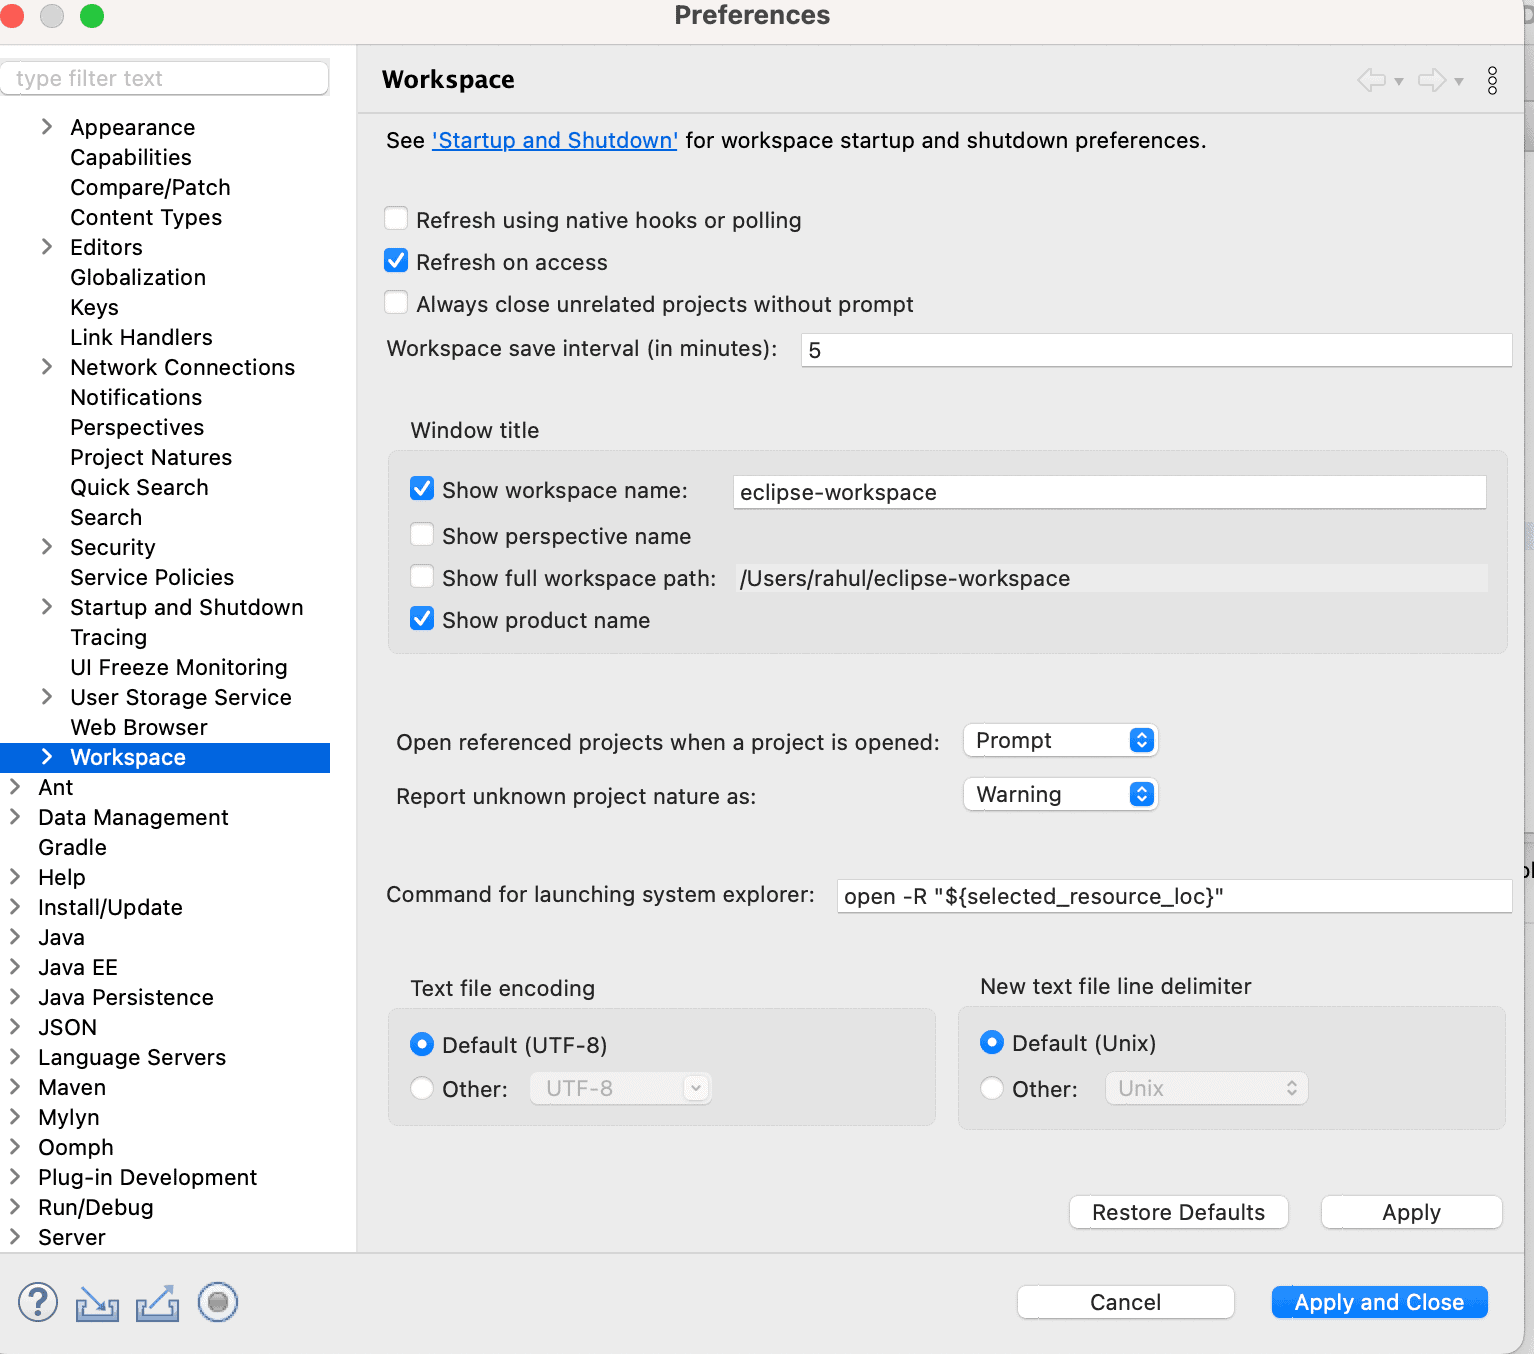
3. Global Configuration
Enabling UTF-8 encoding in Eclipse is an essential and straightforward process for developers as it ensures the source code is properly encoded. It further enables applications to have a wide range of characters available.
To illustrate, let’s look at the steps to enable UTF-8 encoding:
- Open the Eclipse IDE
- Click on the Eclipse in the top menu
- Click on Settings
- Click on General > Workspace
- Check the box next to Default (UTF-8) under Text file encoding
The above-explained entire process is visible in the GUI below:
By following the steps above, we can enable UTF-8 encoding in Eclipse.
Eventually, it permits us to add support for various languages to our project. Furthermore, UTF-8 enables the internationalization and localization of various features and characters from different languages that can be handled consistently across the system.
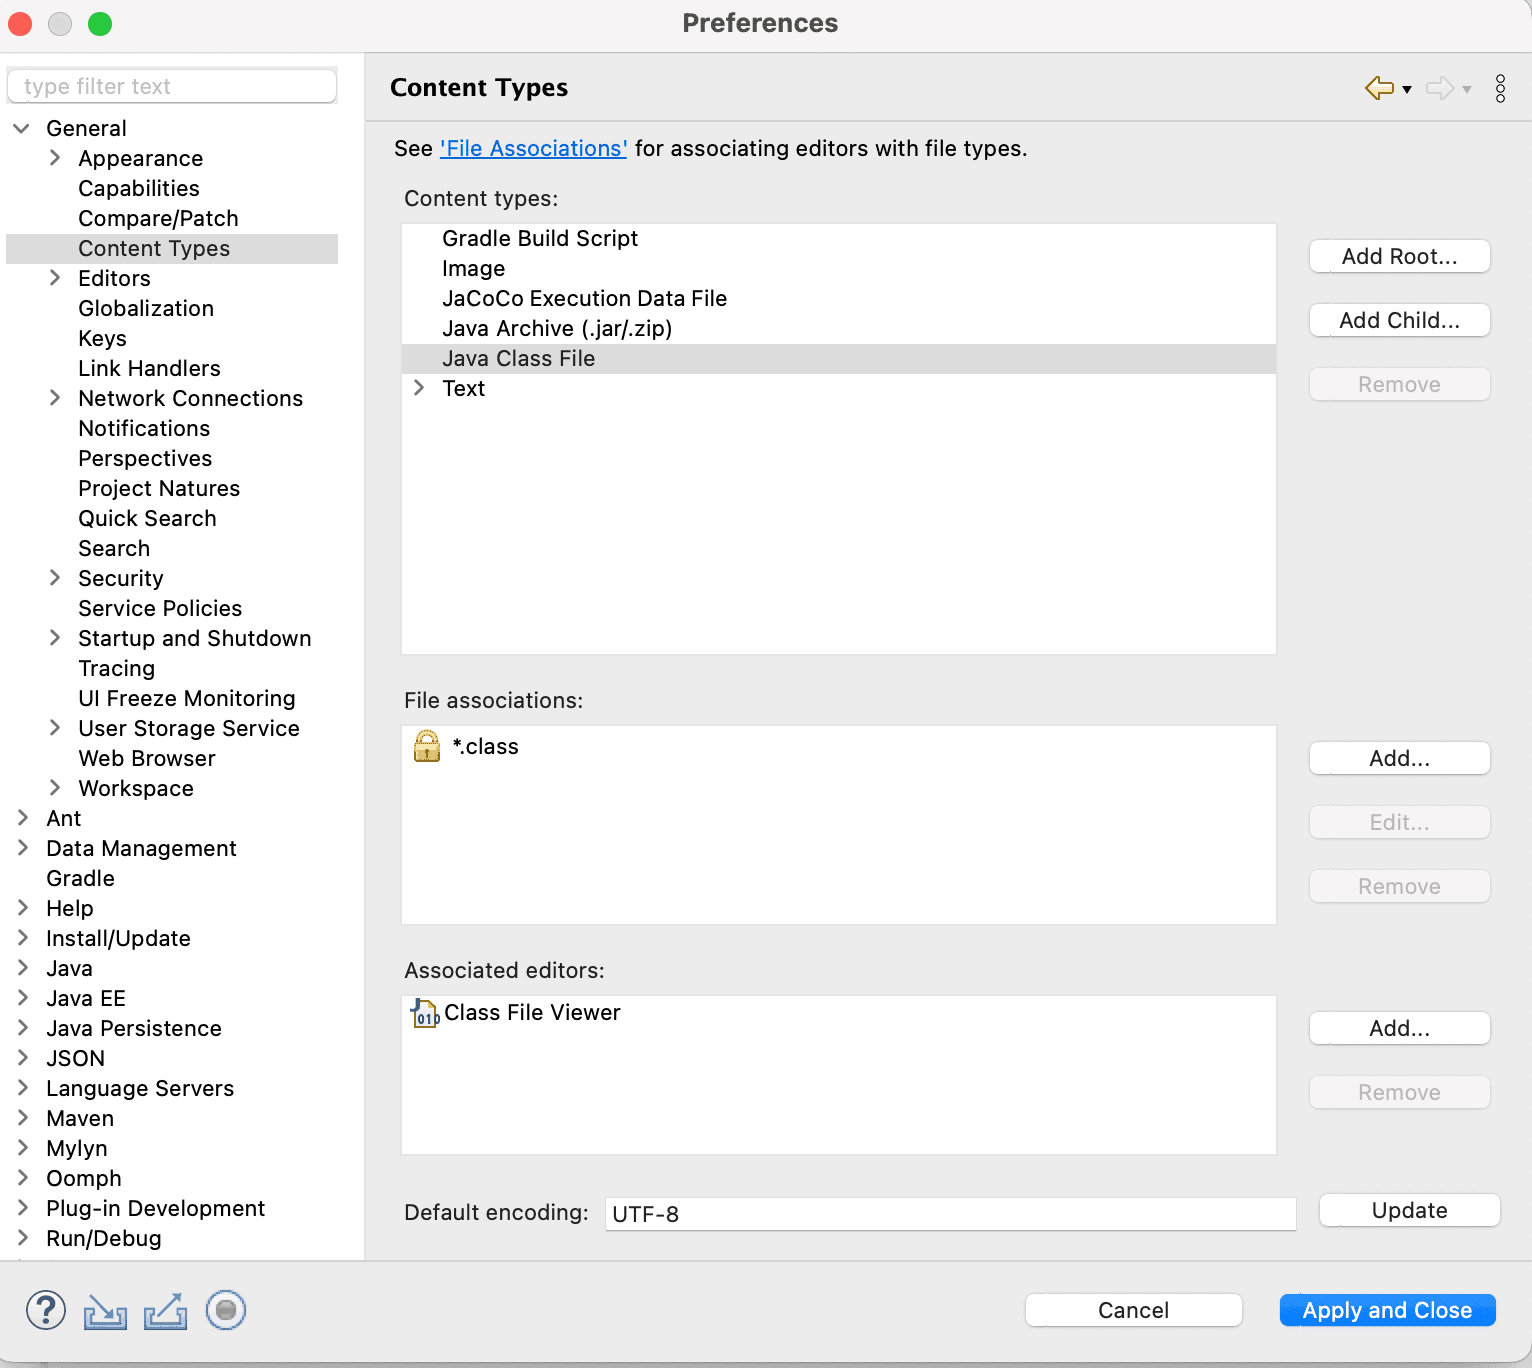
4. Enable UTF-8 Encoding per File Type
In Eclipse, we can also enable UTF-8 encoding per file type.
To illustrate, let’s look at the steps to perform this:
- Open the Eclipse IDE
- Click on the Eclipse in the top menu
- Click on Settings
- Click on General > Content Types
- Pick a File Type (Java Class File)
- Add UTF-8 to the “Default encoding”
Let’s look at the whole process of enabling UTF-8 encoding:
This way, we can enable UTF-8 encoding per file type.
5. Conclusion
In this article, we explored various ways to enable UTF-8 encoding.
First, we enabled UTF-8 encoding for all projects in Eclipse. After that, we looked at enabling UTF-8 encoding per file type.